How to Transform a Covered Porch: Screened-In Back Porch Ideas for Small Spaces
Hey there, porch lover! Picture this: You step out onto your tiny back porch, coffee in hand, ready for some fresh air—only to battle a swarm of mosquitoes or dodge raindrops. I get it; I’ve turned my own cramped covered porch into a cozy retreat, and trust me, it changed everything. Let’s chat about how you transform that overlooked spot into a screened-in haven, even if space feels tighter than a sardine can.
Why Screen In Your Back Porch Anyway?
You know that nagging feeling when your porch sits unused half the year? Screening it in solves that fast. I screened mine last summer, and suddenly, it became my go-to spot for reading or chilling with friends—bug-free and weather-proof.
Ever wondered why small spaces benefit most from this upgrade? Limited square footage means every inch counts, so a screened-in back porch extends your living area without major renovations. Plus, it boosts your home’s value; buyers love functional outdoor nooks.
Assessing Your Small Porch Space
First things first: Measure up! I grabbed my tape measure and sketched my porch layout on scrap paper—it revealed hidden potential I never saw. Focus on width, length, and height to avoid cramming in ideas that won’t fit.
Consider traffic flow too. Does your porch connect to the kitchen or yard? I positioned my screens to keep pathways clear, ensuring easy access without tripping over furniture.
Don’t forget local codes. Check zoning rules before you start; some areas require permits for enclosures. I dodged a headache by calling my city hall early—saved time and cash.
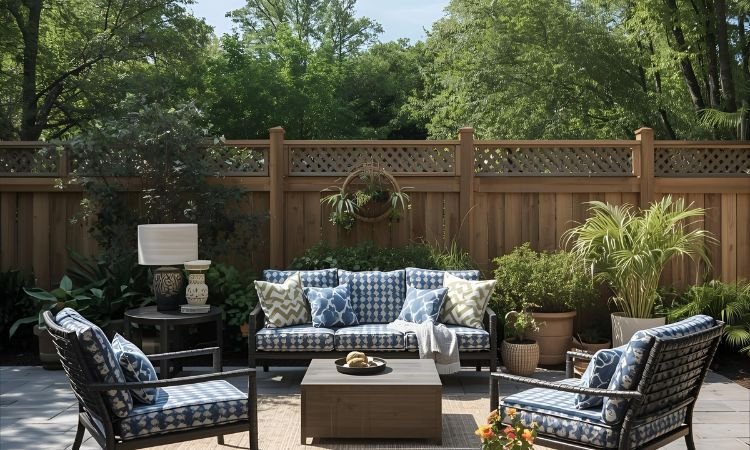
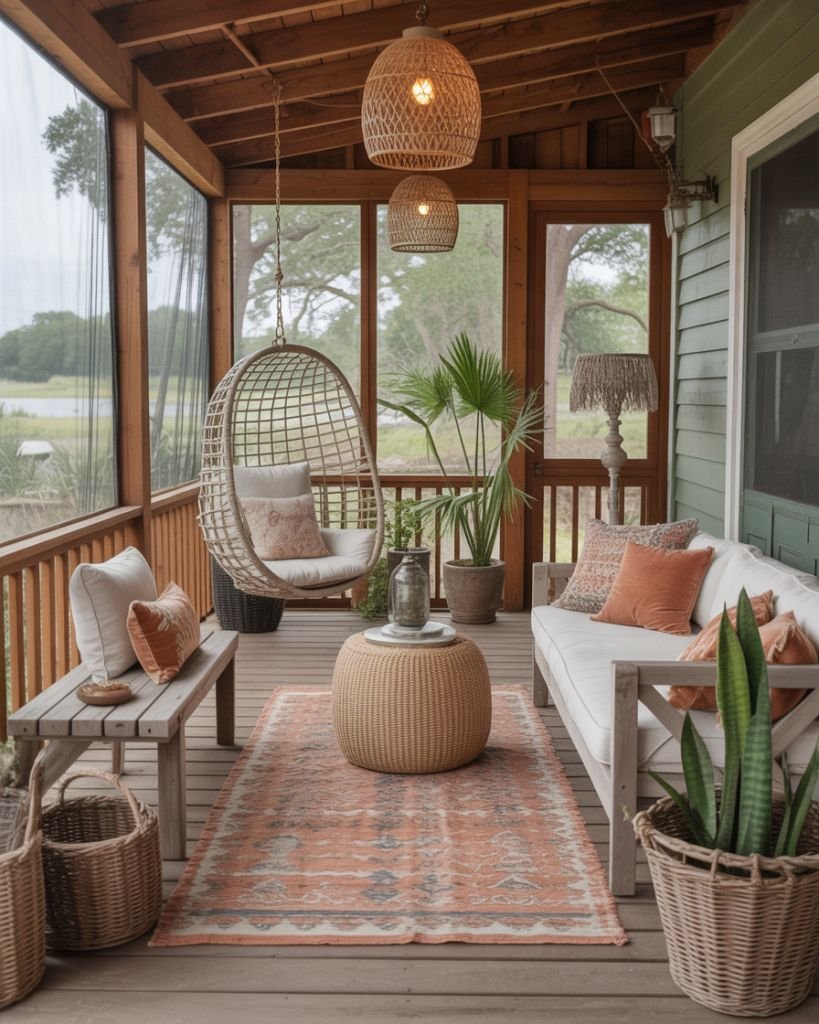
Creative Screened-In Design Ideas
Ready for some inspiration? Start simple with classic mesh screens. They block pests while letting breezes flow, perfect for small porches where airflow matters most.
Want to amp up privacy? Try tinted or patterned screens. I added subtle stripes to mine, and it felt like a private oasis—neighbors can’t peek in, but I still enjoy the view. Who needs curtains when screens do double duty?
For a modern twist, incorporate folding panels. These let you open up the space on nice days or seal it tight during storms. I love how they adapt; it’s like having two porches in one.
Multi-Functional Layouts
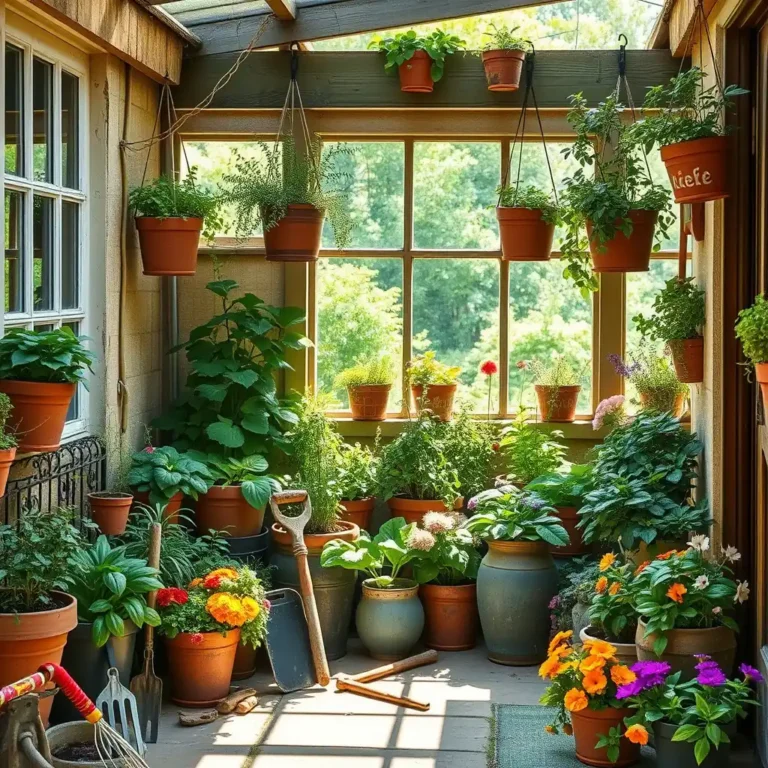
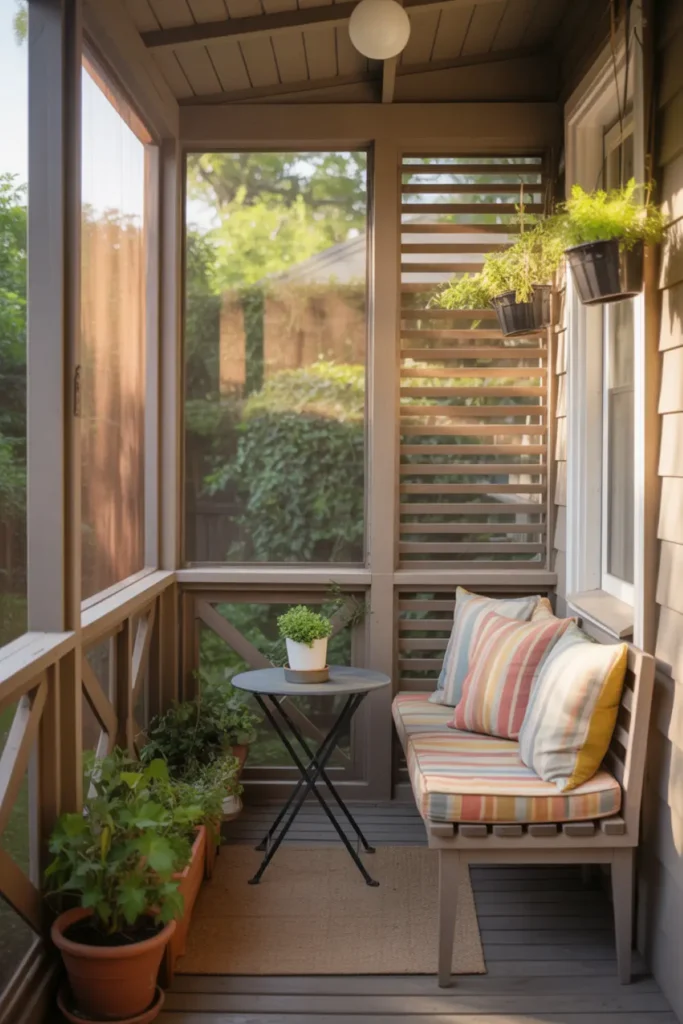
Think vertical! In tight spots, wall-mounted shelves hold plants or lights without eating floor space. I hung a few, and boom—my porch doubled as a mini greenhouse.
Zone your area smartly. Dedicate one corner to seating, another to storage. I created a reading nook with a slim bench; it keeps things organized and inviting.
Experiment with shapes. Not all porches are rectangles—curved screens add flair. I curved mine slightly for a softer look; it tricks the eye into seeing more room.
Choosing the Right Materials
Materials make or break your project. Go for aluminum frames; they’re lightweight and rust-resistant. I chose them over wood because, let’s face it, who wants to repaint every year?
Screens wise, fiberglass mesh wins for durability. It withstands tears better than vinyl, especially in windy areas. My fiberglass setup has held up through two seasons without a hitch.
Budget tight? Opt for DIY kits. They include pre-cut pieces and instructions. I assembled one in a weekend—saved hundreds compared to custom installs.
Comparing Screen Types
- Standard Insect Screen: Cheap and effective against bugs, but tears easily. Great starter option.
- Solar Screen: Blocks UV rays, keeping things cooler. I swear by it for sunny porches; cuts down on glare too.
- Pet-Resistant Screen: Tougher weave for furry friends. If your cat claws everything like mine does, this is a lifesaver.
IMO, solar screens offer the best bang for your buck in small spaces—they multitask without overwhelming the area.
Furniture Picks for Cozy Vibes
Furnish smartly; small porches demand compact pieces. I picked a bistro set with foldable chairs—tucks away neatly when not in use.
Add cushions for comfort. Weather-resistant fabrics like Sunbrella hold up outdoors. I splurged on colorful ones; they pop against neutral screens and make the space feel alive.
Storage is key. Use ottomans with hidden compartments for blankets or tools. Mine doubles as extra seating—genius for impromptu gatherings.
Space-Saving Hacks
- Hanging Chairs: Swing gently without hogging floor space. I installed one; it’s my favorite spot for evening unwinds.
- Wall Planters: Bring greenery up high. They add life without cluttering the ground.
- Modular Sofas: Rearrange as needed. Perfect for small groups or solo lounging.
Ever tried a hammock chair? It fits tiny porches and feels luxurious—total game-changer.
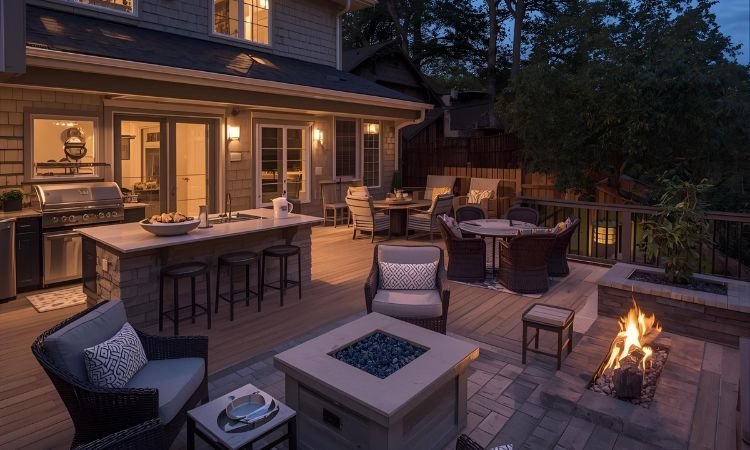
Lighting Up Your Screened Sanctuary
Light sets the mood. String fairy lights along the ceiling for a whimsical glow. I draped some, and evenings turned magical without much effort.
Go functional with motion-sensor LEDs. They illuminate paths safely. Mine activate at dusk; no more fumbling in the dark.
For ambiance, add lanterns. Solar-powered ones charge during the day. I scatter a few around—eco-friendly and charming.
Layering Light Sources
Mix it up! Combine overhead fixtures with table lamps. I layered mine for versatility; bright for reading, dim for relaxing.
Avoid harsh bulbs. Warm white LEDs mimic natural light. They make small spaces feel warmer and larger—trust me on this.
Humor alert: Nothing kills a vibe like buzzing fluorescents. :/ Stick to soft options for that cozy feel.
DIY or Hire a Pro?
Tackle it yourself? DIY saves money if you’re handy. I built my screens from a kit—satisfying, but sweaty work.
Not crafty? Hire experts. They handle permits and precision cuts. I considered it for complex parts; pros ensure everything fits perfectly.
Weigh time versus cost. DIY took my weekend, but pros finish faster. FYI, quotes vary—shop around for deals.
Pros and Cons Breakdown
- DIY Pros: Cheaper, customizable, personal pride.
- DIY Cons: Time-consuming, potential mistakes.
- Pro Pros: Quick, warranty-backed, expert advice.
- Pro Cons: Pricier upfront.
In my experience, mix both: DIY decor, pro installation for structure.
Maintenance for Longevity
Keep it fresh! Clean screens monthly with mild soap. I hose mine down; prevents buildup and extends life.
Inspect for damage. Fix small tears immediately. I patched one early—avoided a bigger headache later.
Seasonal prep helps. Cover furniture in winter. My routine keeps everything pristine year-round.
Quick Tips List
- Vacuum Regularly: Removes dust and debris.
- Use Protectants: Spray frames to repel rust.
- Store Cushions: Indoors during off-seasons.
Ever ignored a tiny rip? It grows fast—don’t learn the hard way like I did.
Budgeting Your Porch Makeover
Plan your spend. Basic screening runs $200–500 for small spaces. I budgeted $300 and stuck to it by shopping sales.
Factor in extras like furniture. Allocate 30% for decor. My total hit $800, but it paid off in daily enjoyment.
Hunt deals online. Sites like Amazon offer kits. I scored discounts—stretched my dollars further.
Eco-Friendly Touches
Go green! Use recycled materials for frames. I incorporated some; feels good reducing waste.
Plant natives. They attract pollinators without much water. My porch garden thrives with low-maintenance locals.
Solar everything. Lights and fans cut energy bills. Sustainable and stylish—what’s not to love?
Common Pitfalls to Dodge
Overcrowd at your peril. Small porches suffocate with too much stuff. I removed extras; space breathed easier.
Ignore ventilation. Screens need airflow gaps. Poor setup traps humidity—mold city, no thanks.
Skimp on quality. Cheap materials fail fast. Invest wisely; I learned after replacing flimsy screens.
Wrapping It Up
So, we’ve covered assessing your space, killer design ideas, materials, furniture, lighting, and more for transforming that covered porch into a screened-in gem. Remember, start small, add personal flair, and enjoy the process. Your back porch awaits its glow-up—grab those tools and make it happen. What’s stopping you? 🙂